Ever wonder while modifying your checkout page how to add extra field in WooCommerce checkout form? You are on the right track. For online stores, checkout pages hold a significant place to win customer trust and make their purchase valid.
Once-in a while, you might have modified your checkout to make it more versatile and interactive to your customer. This guide will teach us how to add an extra field in the WooCommerce checkout form.
All will be done with the help of any plugin, just a few lines of coding! Let’s get started,
What is a WooCommerce Checkout Page, and How does It Work?
A WooCommerce checkout page is an integral part of your online business that serves as the final step in the shopping process. This is where customers provide all the necessary information to complete their purchase.
Customers who click Proceed to Checkout are taken to the checkout page. This page is a form filled with various fields where customers enter their billing and shipping details. Some fields are mandatory and must be filled in for the transaction to proceed. The page also provides options for different payment methods, such as credit cards or digital wallets like PayPal, depending on how you’ve configured your store’s settings.
Additionally, if your online store offers shipping, the checkout page will display available shipping options and their corresponding costs for the customer to choose from. The page usually has a review section as well, allowing customers to verify their order details, including the products, quantities, and total price. Extra features may be included, such as coupon code fields, checkboxes for terms and conditions, or a section for order notes.
The system validates the entered information after all the required fields are filled in and the Place Order button is clicked. The chosen payment gateway will handle the payment process if everything is in order. Once the payment is confirmed, the customer receives an order confirmation both on the screen and via email. The details of this order are then stored in your WooCommerce admin panel for your later review and action.
6 Steps to Add a Custom Checkout Field in Your Checkout Page
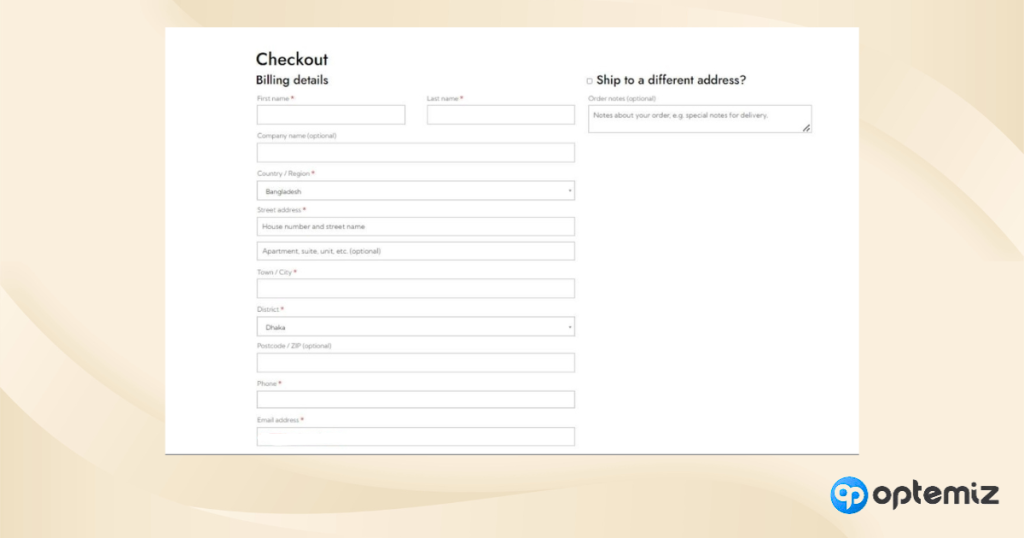
Below, we share the easiest method of how to add extra field in WooCommerce checkout form on your page. Remember, before you add any custom field, your checkout page should look like this-
Step 1: Access functions.php
First, go to Appearance and click on Theme File Editor.

Most modifications will happen in functions.php file, so you should have access.
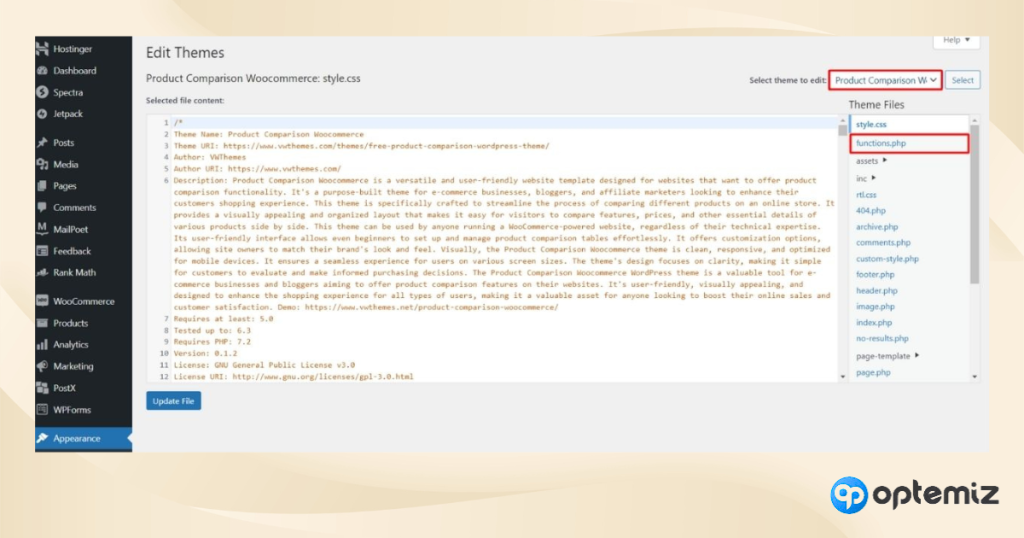
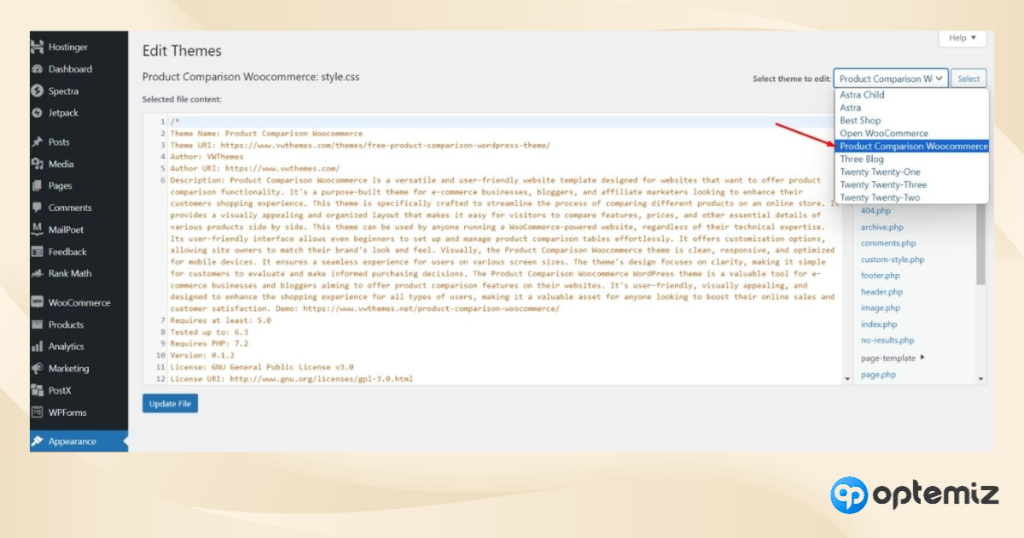
Remember that you are modifying the current theme you are using for the website. So, select it from the drop-down menu.
Step 2: Add a WooCommerce checkout fields hook
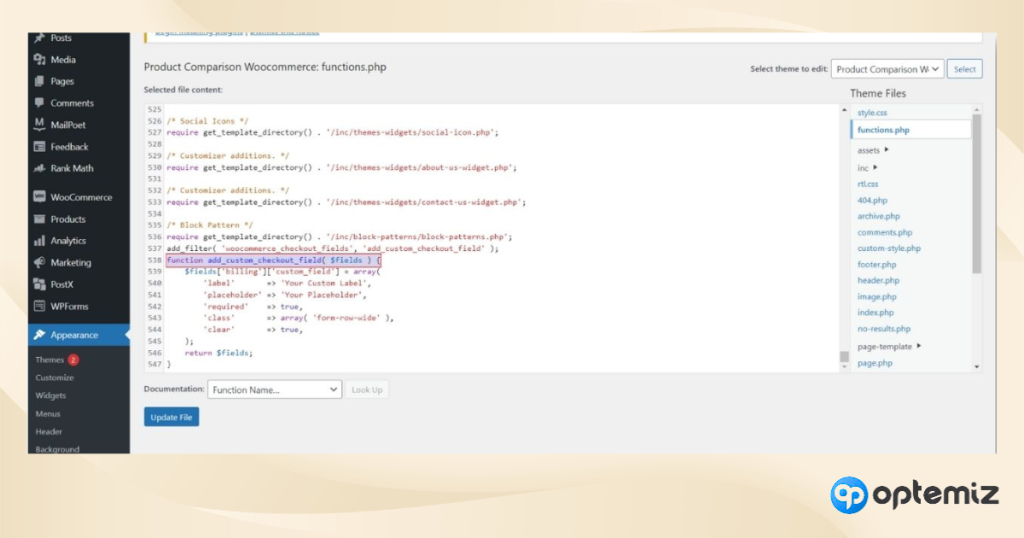
In functions.php, scroll to the bottom and add the following line to hook into the WooCommerce checkout fields:
add_filter( 'woocommerce_checkout_fields', 'add_custom_checkout_field' );It should look like this,
Step 3: Write the custom code to add your checkout field
Write this custom code underneath the field hook,
function add_custom_checkout_field( $fields ) {

    $fields['billing']['custom_field'] = array(

        'label' => 'Your Custom Label',

        'placeholder' => 'Your Placeholder',

        'required' => true,

        'class' => array( 'form-row-wide' ),

        'clear' => true,

    );

    return $fields;

}
It should look like this,
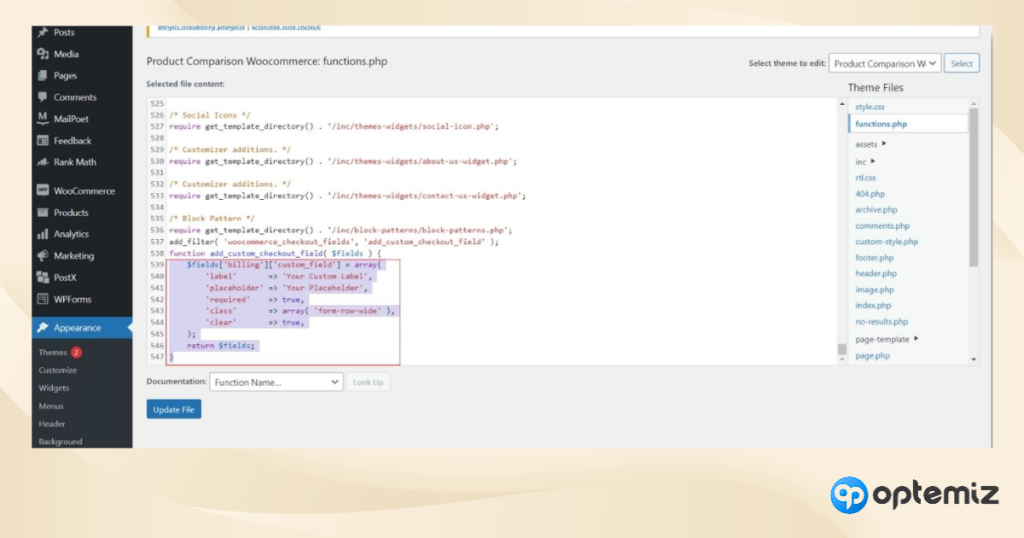
On the Your Custom Label section you can write the custom field’s name like, date of birth, Your opinion, etc.
Step 4: Update your file
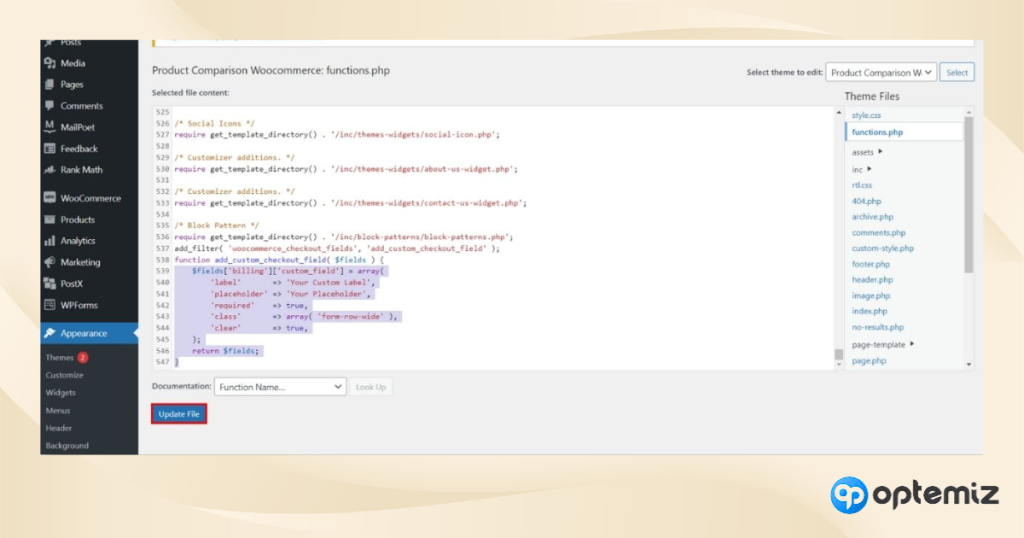
Finally, update your file and refresh the page. It will keep the changes on your functions.php.
Step 5: Test your modifications
You will see a custom field section on your checkout page.
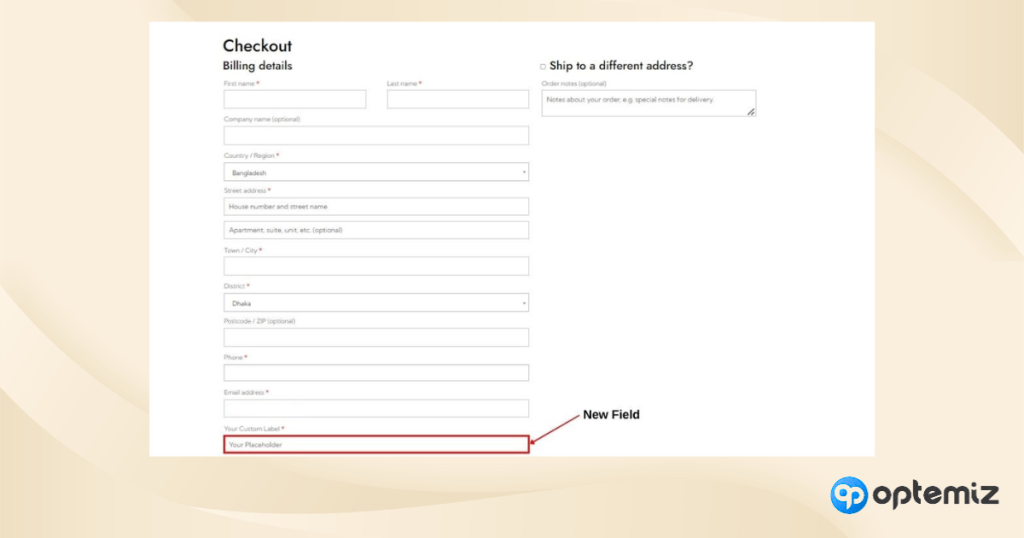
This manual code method works with most of WooCommerce themes, and the best part is you can use this without breaking your website structure.
Step 6: Store custom field data
To save the user input of the custom field into the order meta, add another hook and function,
add_action( 'woocommerce_checkout_update_order_meta', 'save_custom_field_data' );

function save_custom_field_data( $order_id ) {

    if ( ! empty( $_POST['custom_field'] ) ) {

        update_post_meta( $order_id, 'Your Custom Label', sanitize_text_field( $_POST['custom_field'] ) );

    }

}
Add Extra Field in Checkout Page: Final Thoughts
And, that’s it! Now you have learned how to add extra field in WooCommerce checkout form. Your custom field is ready to give some crucial information about customers. However, you should first test this method in a child’s theme before using it in your main theme. Overall, the process is quite handy, and if something goes wrong, you can always delete the code to return your old checkout page.
Best of luck!
